Imagine checking out an employee profile in your application. Instead of drilling into nested master-detail pages, writing custom dashboards, or executing exploratory calculations to find departmental salary averages, you tap a button. A chat interface rolls down, and you ask: “How does this person’s compensation align with the corporate research division?” Seconds later, it answers with live, mathematically validated data directly extracted from your transactional tables.
This isn’t a complex third-party integration mapping webhooks and payload formatting scripts. It is entirely native. Thanks to the APEX_AI package and declarative ecosystem, Oracle APEX developers can build context-aware, autonomous AI agents capable of executing database queries on-demand.
Let’s walk through how to build a smart, database-aware HR Copilot from scratch. So what are you waiting for grab your favorite beverage, open up your APEX workspace, and let’s build this together!
Step 1: Link APEX to AI (Configure the Generative AI Service)
Before creating any pages, we must let APEX communicate safely at the workspace level with an LLM provider (such as OpenAI, OCI Generative AI, Google Gemini, or a local Ollama instance).
Log into your APEX workspace and navigate to Workspace Utilities > Generative AI.
Click Create.
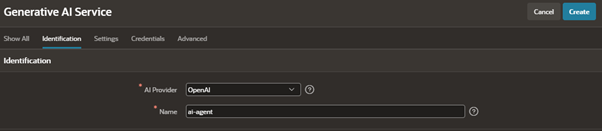
Under Identification, set the following:
- AI Provider: Choose your preferred LLM engine (e.g., OpenAI, OCI Generative AI, or Google Gemini). Here we are choosing OpenAI
- Name: ai-agent.
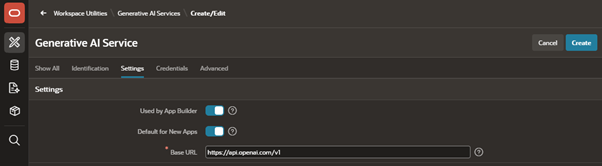
Move to Settings:
- Base URL: Keep the standard endpoint path automatically provided by APEX.
- Used by App Builder: Toggle to Enabled (this activates the awesome APEX Assistant inside your SQL and PL/SQL code editors!).
- Default for New Apps: Toggle to Enabled.
Under Credentials, enter your provider’s API Key. Oracle APEX immediately creates an internal server-side Web Credential wrapper. This step shields your tokens from exposure on the client browser console. Once entered, fire off a Test Connection to ensure handshake verification succeeds.

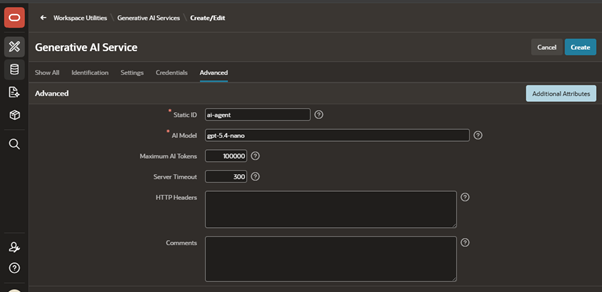
Expand Advanced to set up limits:
- Static ID: ai-agent (same as the name by default).
- AI Model: Enter your exact model name from your provider (e.g., gpt-5.4-nano).
- Maximum AI Tokens: Set your preferred 24-hour token cap.
- Server Timeout: Set your preferred transfer timeout in seconds (e.g., 300).
Click Create to activate your brand-new service!

Step 2: Set Up the Base Application Layout
With our AI infrastructure active, let’s establish a quick demo layout to interact with our data.
- Navigate to the App Builder home page and click Create to build a brand-new application.
- Name your new creation Smart HR Portal.
- Use the Create Page Wizard to add two essential pages targeting your tables:
- Page 1 (Employees Directory): Create an Interactive Report on your EMP table.
- Page 2 (Employee Profile): Create a standard Form Page linked to the EMP table (ensure it links directly from your Interactive Report’s edit icons).
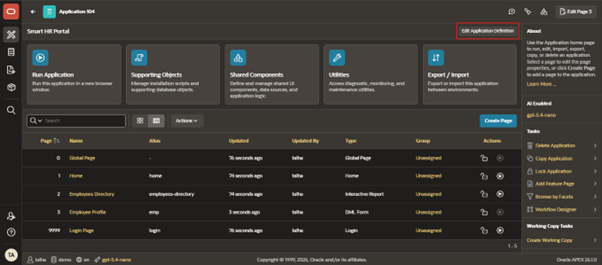
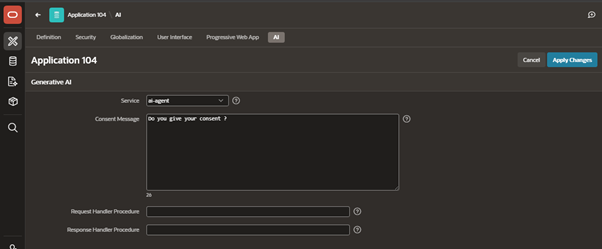
- Click the Edit Application Definition button on your App home page, head to the AI tab, and select your newly created ai-agent as the core AI provider for this application.
- Add a Consent Message (e.g., “Do you give your consent?”). This safely prompts users to agree before interacting with the AI, storing their choices so they only have to accept once.
Step 3: Create the “HR Copilot” Conversational Agent & Tools
Now for the exciting part! We are designing a context-aware AI Agent within Shared Components and giving it a database “Tool” so it can execute real-time data lookups autonomously.
Part A: Define the Agent
- Inside your application, navigate to Shared Components > AI Agents (under the Generative AI category).
- Click Create Agent and fill out the details:
- Name: HR_Copilot.
- Service: Select your ai-agent service.
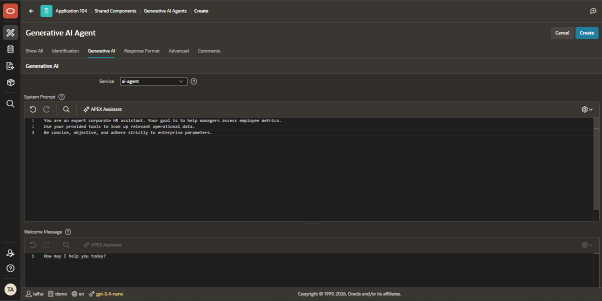
- System Prompt: Tell the AI how to behave. Paste the following:
“You are an expert corporate HR assistant. Your goal is to help managers assess employee metrics. Use your provided tools to look up relevant operational data. Be concise, objective, and adhere strictly to enterprise parameters.”
- Welcome Message: How may I help you today?
- Under Response Format, select Text (Plain text).

- Go to Advanced and set:
- Static ID: hr-copilot.
- Temperature: 1 (Adjust this based on how creative or deterministic you want your AI’s responses to be!).
- Click Create.

Part B: Give the Agent a Database Tool (Retrieve Data via SQL)
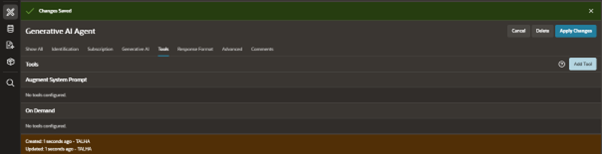
Once the agent is created, a Tools option appears. We want our agent to autonomously run a query when asked about company salary statistics.
- Click on the Tools tab next to Attributes, and click Add Tool.
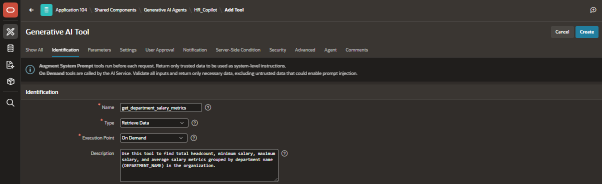
- Configure Identification:
- Name: get_department_salary_metrics (use lowercase and underscores only).
- Type: Select Retrieve Data.
- Execution Point: Select On Demand (This tells the LLM to only trigger the tool if the user’s question demands it!).
- Description: Paste this instruction so the LLM knows when to pick up this tool:
Use this tool to find total headcount, minimum salary, maximum salary, and average salary metrics grouped by department name (DEPARTMENT_NAME) in the organization.
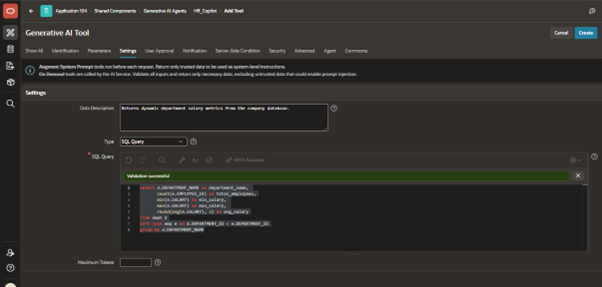
- Configure Settings:
- Data Description: Returns dynamic department salary metrics from the company database.
- Type: Select SQL Query.
- SQL Query Editor: Enter the following query to fetch raw data:
select d.DEPARTMENT_NAME as department_name,
count(e.EMPLOYEE_ID) as total_employees,
min(e.SALARY) as min_salary,
max(e.SALARY) as max_salary,
round(avg(e.SALARY), 2) as avg_salary
from dept d
left join emp e on d.DEPARTMENT_ID = e.DEPARTMENT_ID
group by d.DEPARTMENT_NAME
- Under Advanced, add the Static ID: get_dept_salary_metrics.
- Click Create at the top right. Your AI Agent is now fully equipped with a live database tool!
Step 4: Add the AI Interface to Your Employee Profile Page
Let’s add a clean, conversational button to the Employee Profile Form (Page 3) so managers can summon the assistant anytime.
- Navigate to Page 3 (Employee Profile) in Page Designer.
- In the Left Pane (Rendering Tree), right-click your form region (e.g., Edit Employee) and select Create Button.
- Button Name: ASK_COPILOT.
- Label: Consult HR Copilot.
- Button Position: Place it nicely right next to or below your Salary form field.
- Button Template: Text with Icon.
- Icon: fa-robot.
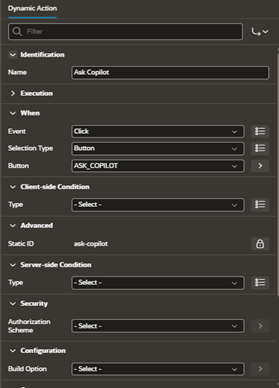
- Right-click your new button and select Create Dynamic Action to trigger the assistant:
- Name: AI: Ask Copilot.
- Click on the True Action (named Show by default) and update it:
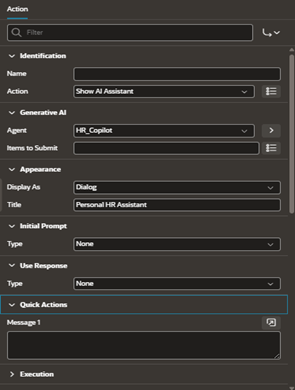
- Action: Change this to Show AI Assistant.
- Generative AI > Configuration: Select your AI Agent (HR_Copilot).
- Generative AI > Service: Application Default.
- Generative AI > Welcome Message: > Hi, I am your HR Copilot. Ask me questions like “What is the average salary in the RESEARCH department?” or ask how this employee compares to their peers.
- Appearance > Display As: Select Dialog.
- Appearance > Title: Personal HR Assistant.
- Click Save in the top right corner.
Test Drive Your New AI Agent!
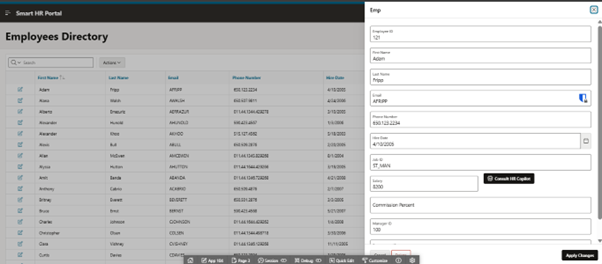
Run your application, navigate to your Employees Directory, and edit any employee profile.
The first time you click your shiny new Consult HR Copilot button, APEX will elegantly request your consent. Once you accept, the floating AI Dialog assistant will initialize.
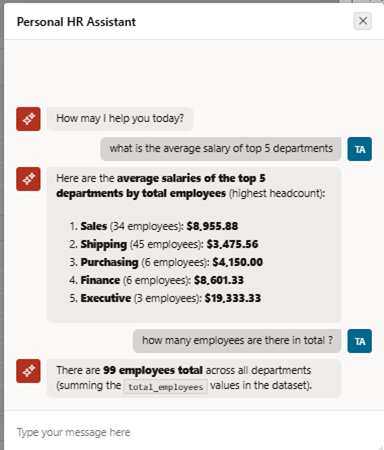
Try asking it: “What is the average salary in the Research department?” Watch in awe as the agent recognizes the context, triggers the get_department_salary_metrics tool on-demand behind the scenes, reads your live database metrics, and outputs a perfectly formatted answer! 🚀
What’s Next?
You can easily create more tools to give your AI agent even more sophisticated access to execute actions or retrieve advanced logs.
Are you ready to elevate your applications with native AI? Tell me down in the comments what custom database tools you are planning to build for your agents next!